Overview
Story Navigation provides runtime controls that allow trainers to navigate through training moments during VR sessions. Think of it as “VCR controls” for your VR experience—trainers can pause, skip ahead, or reset to review previous moments. This feature is useful for:- Demonstrating specific moments without completing the entire module
- Skipping ahead to let trainees practice particular sections
- Resetting to review previous moments
- Pausing the experience for discussion or instruction
How Story Navigation Works
Story Navigation connects to VRseBuilder’s playback system, which manages the flow of moments and chapters in your training module. When added to a scene, the navigation UI provides three core controls:| Control | What It Does |
|---|---|
| Pause | Freezes the current moment, stopping all active actions and timers |
| Skip | Advances to the next moment, completing the current one |
| Reset | Returns to the beginning of the current moment or chapter |
Note: Story Navigation controls only appear in Training Mode. They are automatically hidden during Evaluation Mode to ensure assessments run without interference.
Quick Setup
1. Add the Prefab to Your Scene
Navigate to the prefab in your Project window:
2. Position the Controller
Move the prefab to a location where trainers can easily access the UI without obstructing the training environment.Tip: Consider placing the controller near the trainer’s typical standing position, or in a consistent location across all training modules.
3. Test the Setup
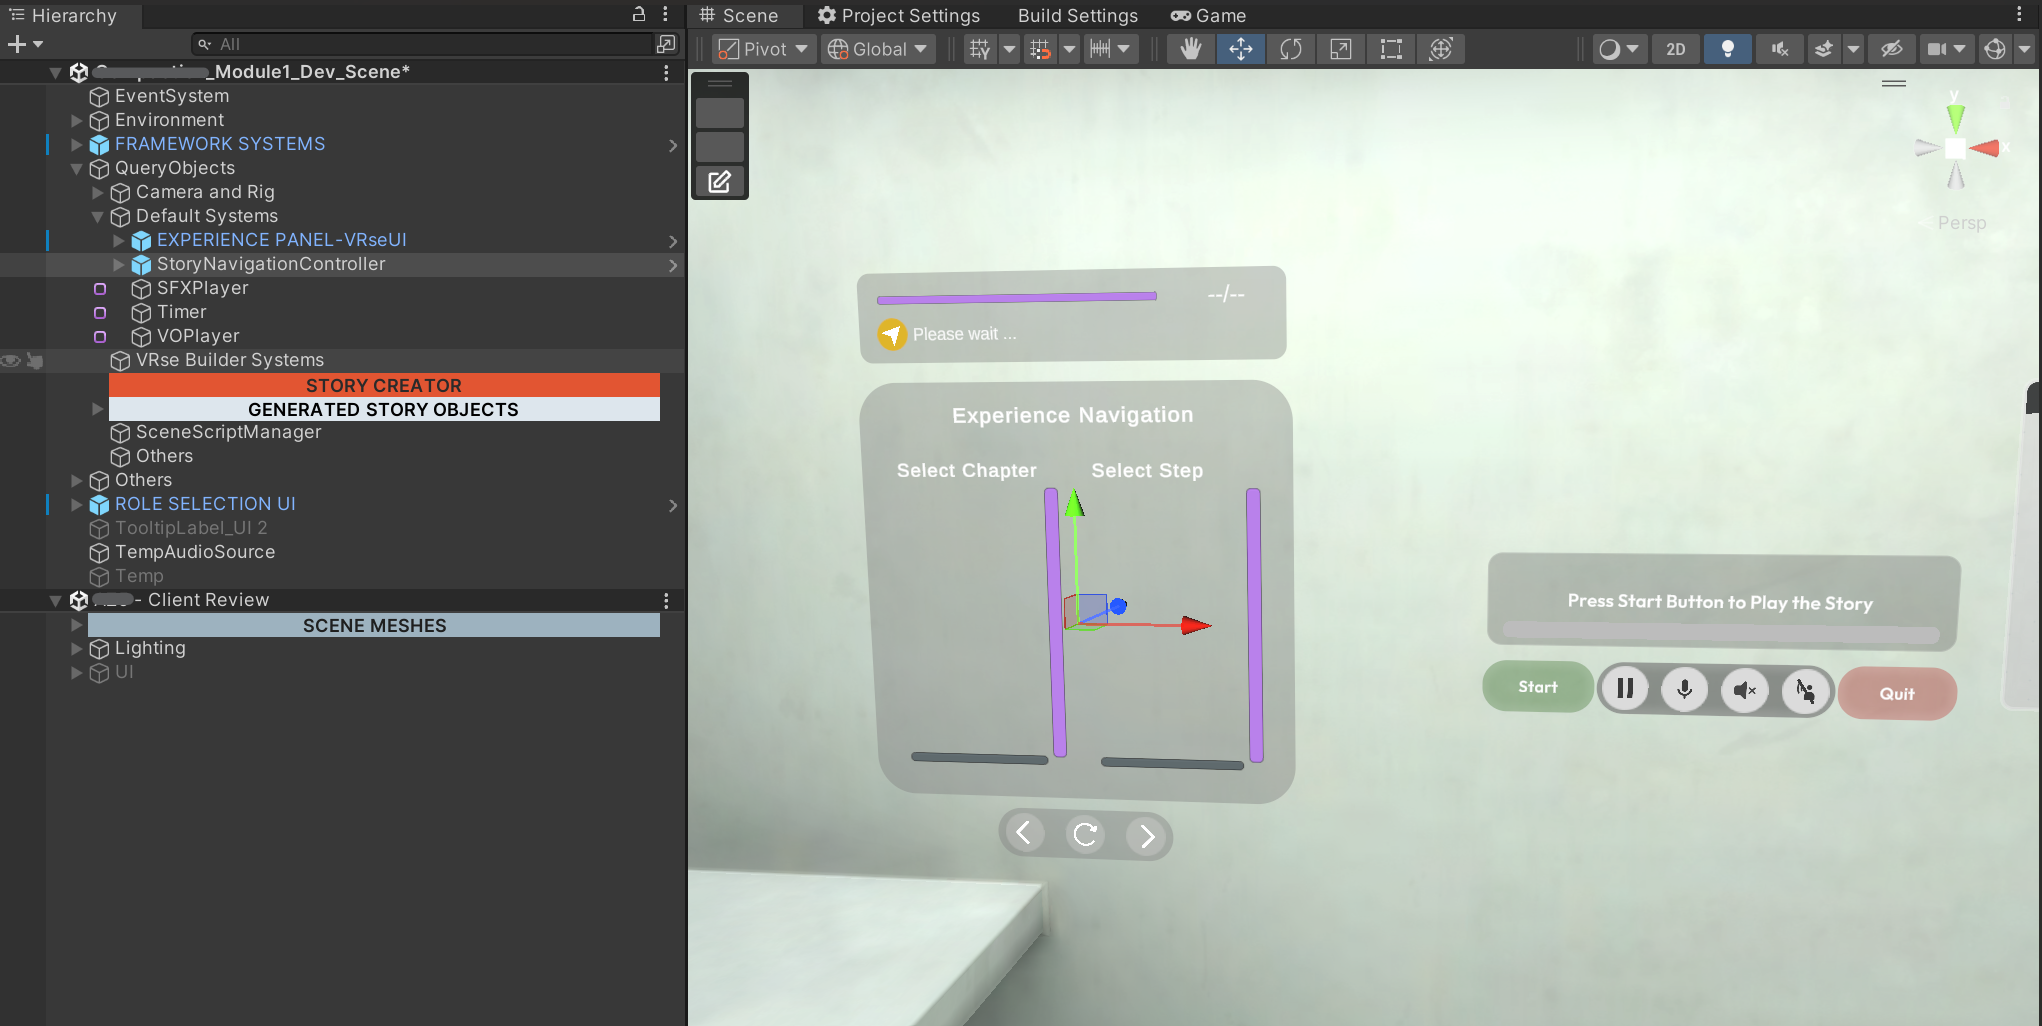
Enter Play mode. The navigation UI appears and responds to the current module’s moment structure. No additional configuration is required—the prefab auto-connects to the Story system.Configuration
Enable or Disable Step Navigation Per Module
Control whether the navigation UI appears for specific modules:- Select your RoomManagerConfig asset (e.g.,
RoomManagerConfig_AZ - Compaction) - Expand the module under Modules Data → Experiences
- Locate the Step Navigation section
- Toggle Enable Step Navigation:
- ✅ Enabled (Default) — Navigation UI is visible and functional
- ⬜ Disabled — Navigation UI is hidden for this module
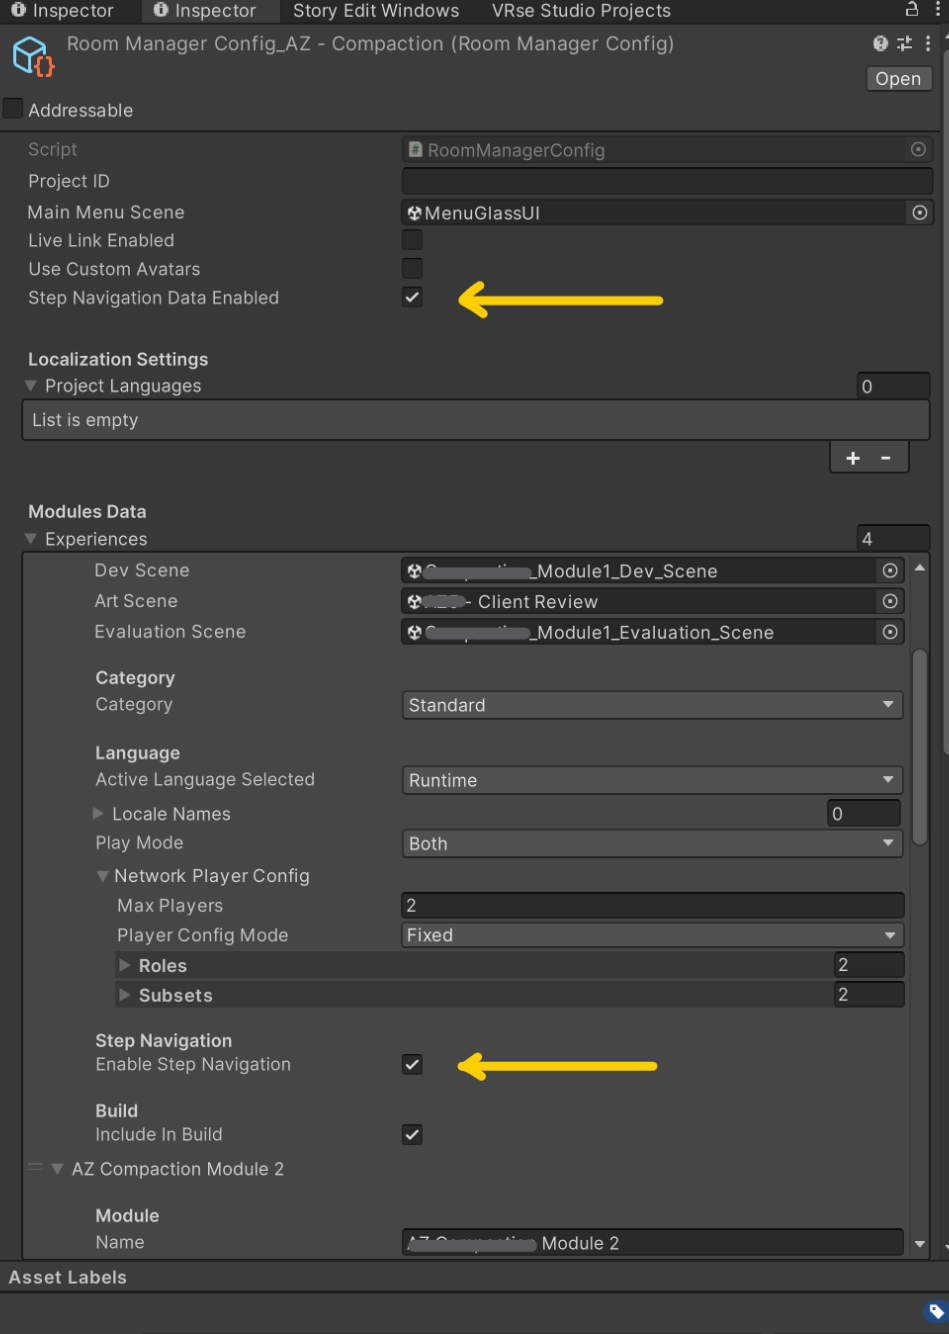
Enable or Disable Analytics Capture
Control whether navigation events are tracked and sent to the Pulse dashboard:- Select your RoomManagerConfig asset
- Locate Step Navigation Data Enabled in the top-level settings
- Toggle the checkbox:
- ✅ Enabled (Default) — Navigation events are tracked and sent to analytics
- ⬜ Disabled — Navigation events are not captured
Configuration Reference
| Setting | Location | Default | Purpose |
|---|---|---|---|
| StoryNavigationController | Scene Hierarchy | Must be added manually | Provides the navigation UI |
| Enable Step Navigation | RoomManagerConfig → Module → Step Navigation | ✅ Enabled | Show/hide UI per module |
| Step Navigation Data Enabled | RoomManagerConfig (top-level) | ✅ Enabled | Enable/disable analytics |
Multiplayer Behavior
In multiplayer sessions, only the host can control navigation. When the host pauses, skips, or resets, all participants are synchronized automatically. Participants do not see or have access to the navigation controls.Actions and Triggers
Limitations
| Limitation | Details |
|---|---|
| Training Mode only | Controls are hidden in Evaluation Mode |
| Host-only in multiplayer | Participants cannot control navigation |
| Requires compatible Actions/Triggers | Custom Actions and Triggers must implement navigation support to respond correctly to Pause, Skip, and Reset commands |